This page is best viewed
at 800x600 resolution or greater
The Kitten Factory
Image Works - Tutorial 2
Tutorial 2
Welcome to my basic coloring tutorial! In this tutorial, I go through how I go about coloring a picture!
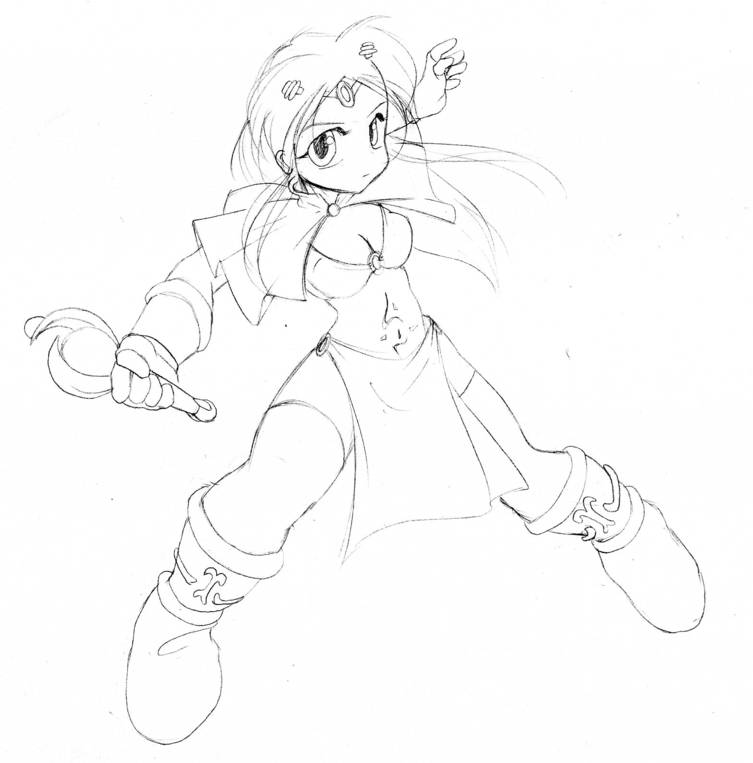
First, I start off with my "bubble" person. If you don't know what my bubble people are, go look at Tutorial one ^_^ In any case, I use the bubble person as a rough layout for my image. After I have my bubble person done, I usually scan it in and print it out for me to trace over. Why? Because my bubble people are usually thumbnails. They tend to be 1-2 inches tall. When I draw something, I scribble about 5-10 of these things roughing out what I want to draw until I get a pose I'm happy with. It's also helpful when roughing out coordination with other people in the same picture. It lets me imagine the layout of multiple people in the same image.
After the bubble person is resized and reprinted, I get a clean sheet of paper and put it over the bubble person. I "trace" the general form of the bubble person and add detail until the picture is done. This is the actual "drawing" process. How a person interprets the skeleton into actual image is completely on their own. Each person has their own attention to different details... and that's why we all have our own styles ^_^
Once I have a sketch finished, I scan it in and clean it up on my computer. In this case, you'll notice that I edited the eyes a bit on my computer. I do most of my tweaks on the computer because it's easier for me ^_^ I tend to stretch, scale, resize, and skew parts of the picture once I've scanned it in order to tweak the image more to my liking.
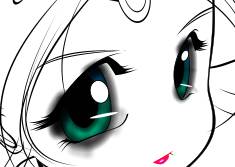
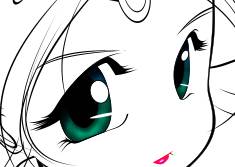
The first thing I usually color is the eyes. If I don't like the eyes, then I usually don't like the picture ^_^ I start off with a flat base color. That will be the underlying color of the character's eyes. Then, I copy that color and make it a faded transparency to a different color. Usually this second color is complementary to the existing color. If the first color is green then the second color is blue and vice versa. Browns usually get black, hazel gets green, etc. After that, I use the airbrush tool to add some depth to the eyes. This usually involves lining the edge of the eye with some darker shade of the existing color or black. I pay attention to fade all the edges and bring the top to black. I also make some straight lines, usually smaller, radially around the eye coming out from the center. Finally, I take all those pieces and clean them up. In photoshop, that would involve erasing areas. Because I use a vector based tool, this means cropping all those pieces to the first polygon I created. ^_^
After that, I do flat shading. In Photoshop, that would require a lasso tool and\or flat fill. In vector tools, that requires creating a new layer underneath the line layer and creating a bunch of flat shaded polygons.
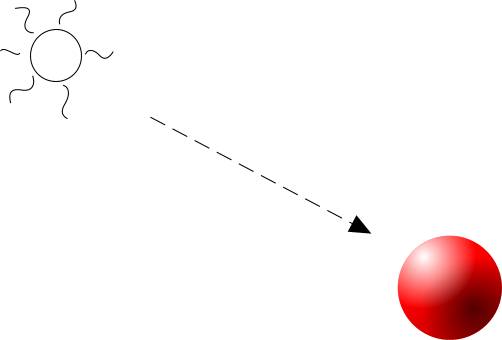
Now, basic shading. If you notice the way shadows fall in real life, most of the time shadows are rendered because of the sun. ^_^ When I say "the sun", it's because the human eye is evoluationarily 'used to' seeing everything lighted by the sun. In scientific terms, the sun is a good approximation of an infinate point directional light source. It's always "far away" and always points at the ground. That's why horror movies or spooky stories by the campfire rely on lighting from below. It's "unnatural". We're not used to seeing people lit from below so it makes us look instinctively scary. ^_^
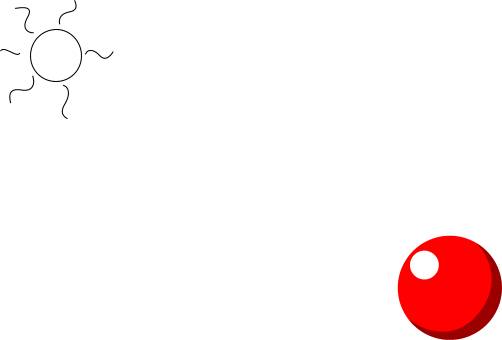
If rendered into a basic flat cartoon, the lighted ball above would look like this. A simple red ball with a specular highlight caused by the sun. What's a specular highlight? It's a shiny spot. Basically, anything shiny will reflect a shiny specular highlight.
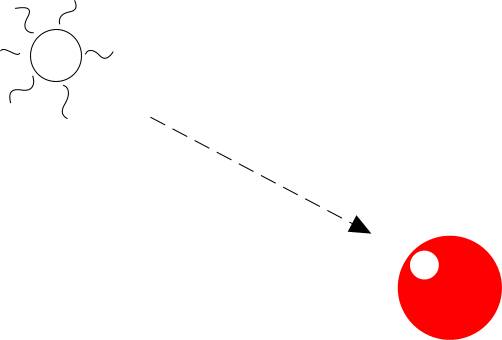
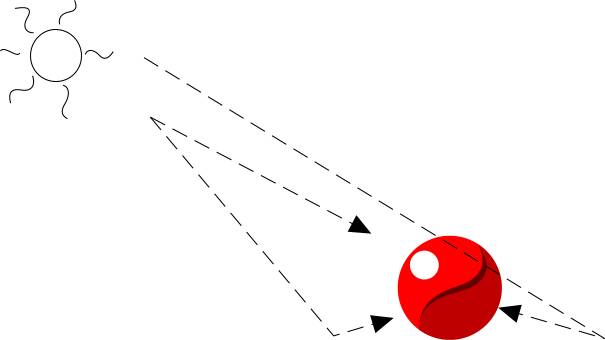
Because the sun emits light, the object would have a shadow on it's cast surface. Why does it look so odd?
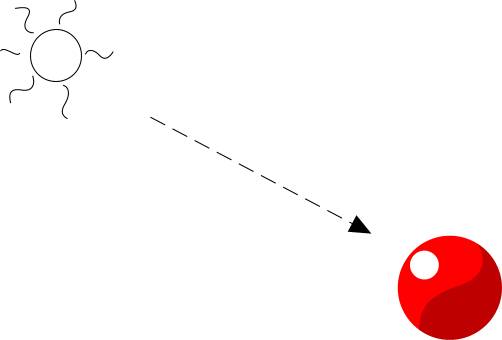
Because of the light reflected off the floor. ^_^ People tend to forget, light travels straight... but it also bounces. If the floor didn't exist, the ball would be shaded like a perfect sphere... but because the floor bounces light back up at the bottom of the ball, the shadow isn't a perfect circle. It makes things look a little less "floating in space" too.
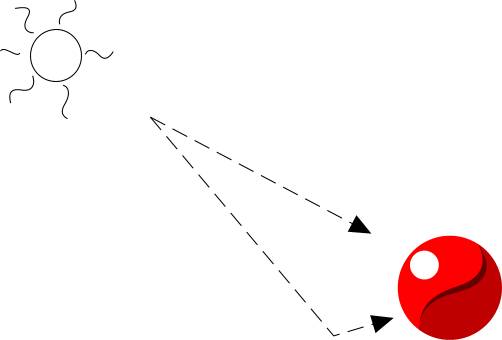
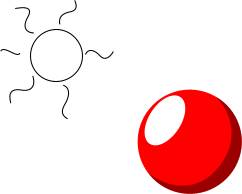
What's this? It looks like my pokeball suffers from a wound! It's a scar! Actually, no, it's not. ^_^ You see this a lot on images shaded in anime. Why?
Pin-pon! Yes! Reflected light! The light reflected from behind the ball gives it a lightened area behind it, thus forming a darker shadow in the middle! It doesn't always happen that way, but in an imaginary world, it's a fake way to create a sense of depth. It doesn't happen on all objects either... it usually only happens on shiny objects, like glossy surfaces, balls, and happy shiny people. ^_^
And there you go, shaded ball! Godachu, I choose you!
Now something more common in shading that a lot of people "suffer" from when they shade is shown here. It's not necessarily a bad thing, but it fails to take into account lighting. They tend to "shade" very close to the edge falling away from the source of light. This tends to make a sliver of shadow on the bottom. This isn't "wrong", it just looks odd. Most things are lit from a distance far enough so that objects have a 50% shadow coverage.
The only situation where that type of lighting is correct is if the light source were very very close. In cases like that, you have to make sure the light source shading is consistant on all the objects, moving from the same source.
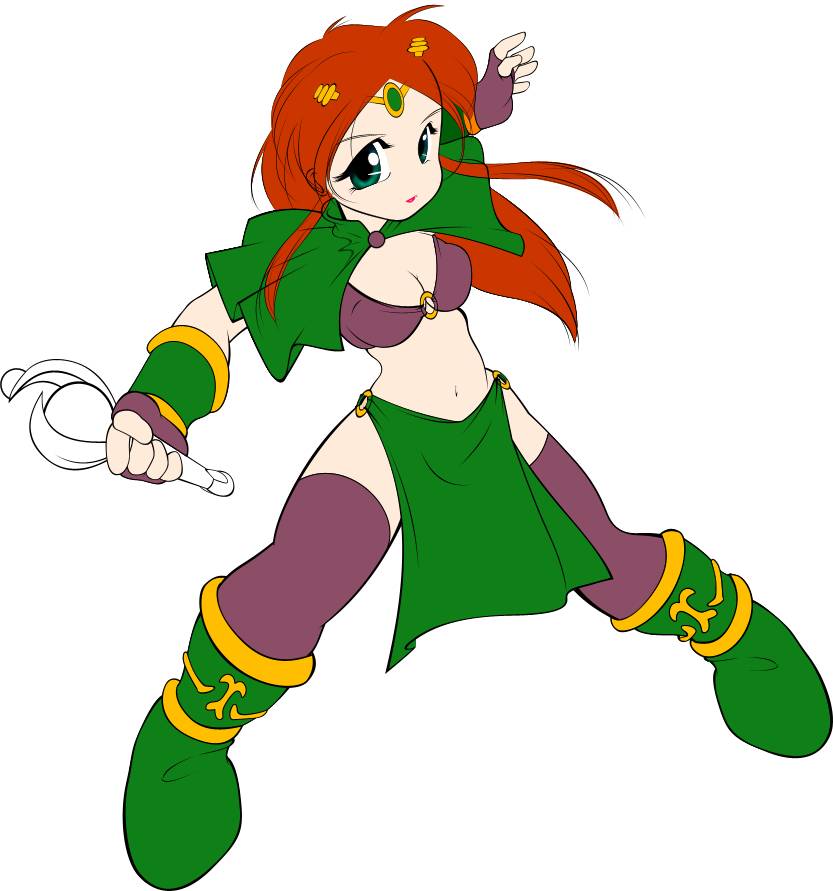
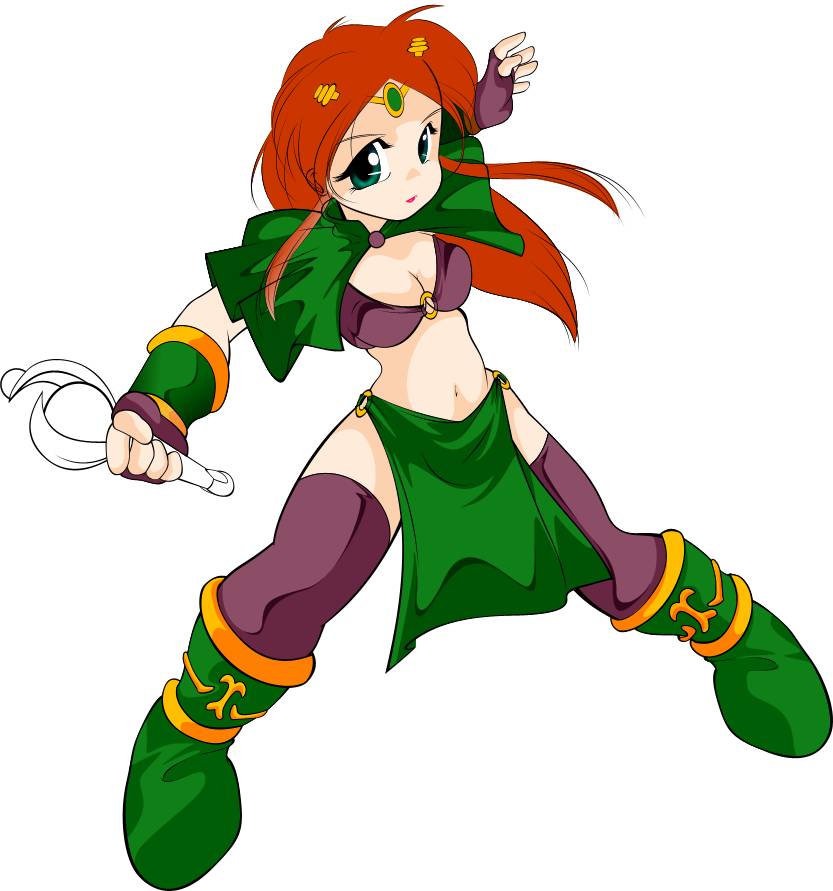
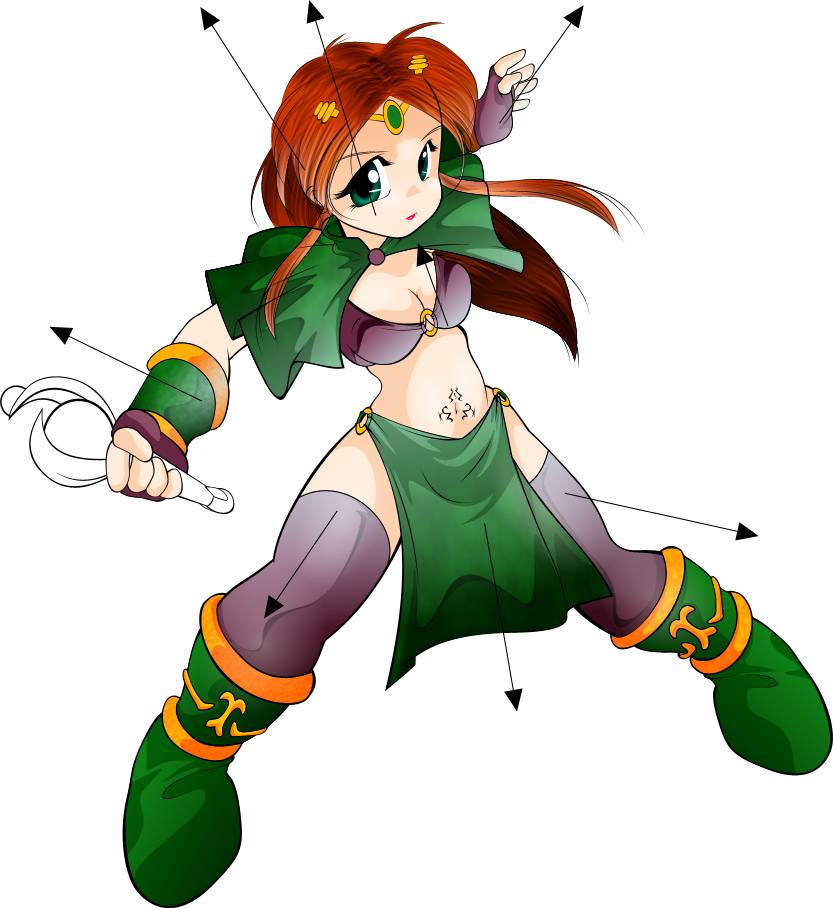
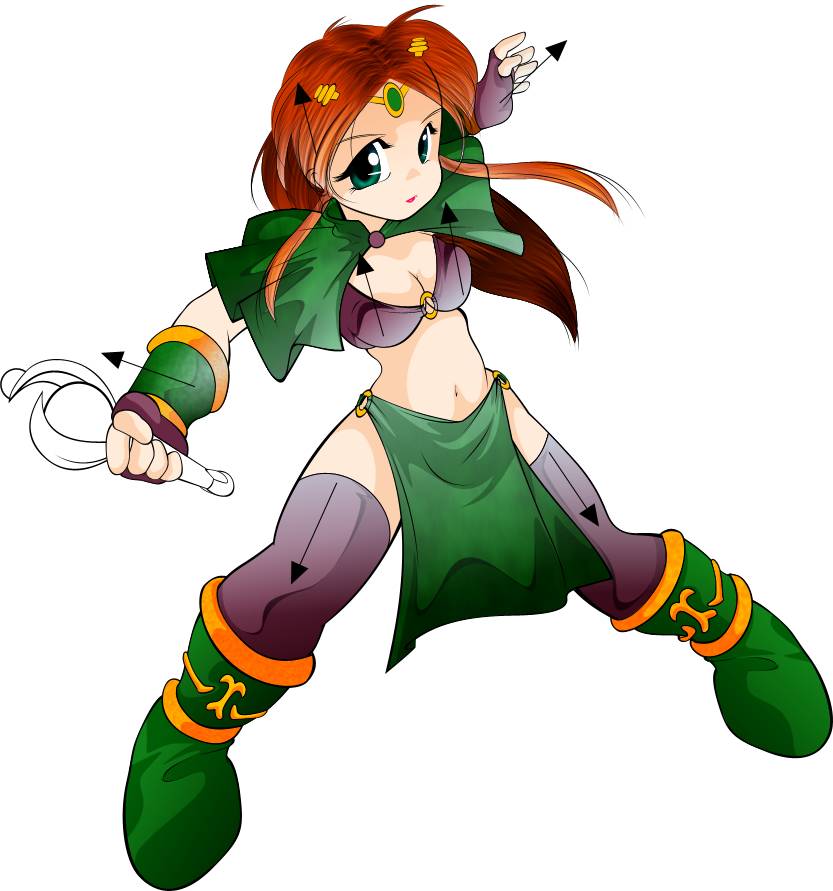
This is how I shaded my Sorceress girl.
You'll notice on the lighting on her, I made the lighting go radially outwards from her belly area. That's because on the final, I had the light from her cast spell cast a light light source close to her body ^_^ The arrows illustrate the direction the light is cast, not the fun the hordes of Diablo's skeleton archers had shooting her.
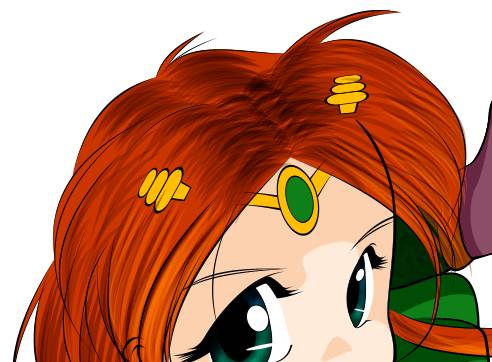
Now, this is how I shade hair (currently). I didn't always shade hair this way... but recently, I thought of how to do it and I like it a lot. ^_^ Basically, I get a single "multiply" transparency polygon and clone it a couple hundred times, moving it and rotating it a little each time I clone it. In Xara, it's pretty easy since I just have to select an object, hold down the left mouse button and "stamp" away with my right mouse button. I'm not sure how this can be done in Illustrator or Photoshop without being driven insane. ^^; I often only do a small patch this way. I usually end up "cutting and pasting" that small patch and moving it around to fit other locks of hair.
After I'm done with the shading, I move towards the highlights. In this case, the highlights were near the bottom of her hair since that's where the light source was coming from, her magic spell. I do it the same way as the shadow except with a "bleach" mode. In photoshop, this would correspond to "screen" or "lighten".
If you want a better example, here's a close up on my "cow"'s hair... it's a much better example for how I shade hair. In this picture, you can see each of the polygons that are cloned and moved.